Remotely Brew a Cup of Tea: Spacebrewer
/We wanted to make a device that would allow us to remotely brew a cup of tea. Why? Because tea is awesome! On those cold winter days, you would be able to have a tea brewed and ready for you by the time you arrived home. You can also brew tea for your friends and family even if you're across the other side of the world, who doesn't want a tea made for them over the internet?
Using the power of Spacebrew, this enabled us to use mobile phones, arduino and processing as an intermediate step to control a hacked water heater. For this instructable, we will assume you are familiar with the basics of arduino and processing.
To recreate this project, you will need the following:
Hardware
1 x Water Heater (We used this one)
1 x Arduino
2 x standard servos
1 x micro servo
1 x continuous rotation servo
1 x pair of IR emitter/detector (https://www.sparkfun.com/products/241)
1 x 330 ohm resistor
1 x 10k ohm resistor
1 x Tea cup
1 x spool of fishing line
1 x 5 volt power supply
1 x DC barrel jack (breadboard friendly or not, up to you)
Breadboard, wire, solder, etc
Side note: we used a good amount of this great heavy duty mounting tape because it joins things extremely well and is really easy to use. It's amazing. Seriously.
Software
Processing
Arduino
Spacebrew (more info in the next step)
3D printed parts
We printed the tea bag and sugar dispensers on our own 3D printer. You can find the files below and also here on Thingiverse
All files can be downloaded here.
Step 1: Rapid Introduction to Spacebrew

Spacebrew is an amazing tool for connecting devices, programs and interactions quickly and easily. With it you don't need any knowledge of web technologies to be able to prototype projects that communicate via the internet.
In order to take the tricky html/css/javascript coding out of the web side of things, Spacebrew consists of a series of libraries for Arduino, Processing, Javascript (for browser based interactions) and OpenFrameworks. We recommend you take a look at Brett and Julio's Getting Started Guide.
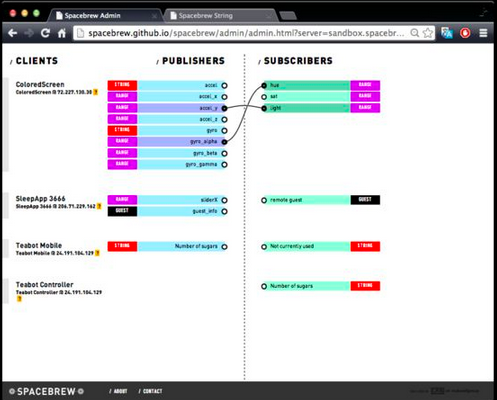
Essentially, whenever a Spacebrew example is run (processing, javascript, etc.), a "publisher" or "subscriber" is created on the Spacebrew server. The official documentation has examples of how to run your own server, but there is also apublic server available for use immediately.
Publishers
A "publisher" is basically something sending out some form of data. These will show up on the left column of the server.
Subscribers
Subscribers show up on the right column of the server and will receive information that is sent to them.
Connections
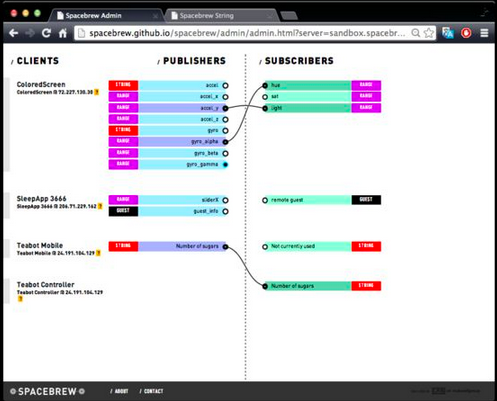
The most fun and easy part! The browser based graphical interface allows you to literally make connections between publishers and subscribers by clicking on the nodes as seen in the photo above. It really is that easy.
Data Types
The type of data that can be sent. This must be the same on both the publisher and subscriber side in order for a connection to be made. Booleans, intergers from 0-1023, and strings of text are supported immediately with the option to create custom data types for slightly more advanced users).
This Instructable...
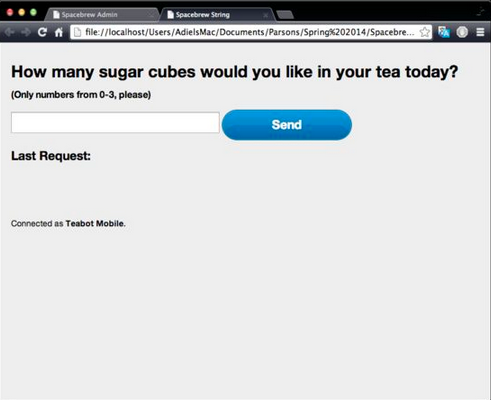
Will use a modified version of the "Javascript String Sender" example. The modifications made to it only serve to make the on screen text a little more relevant, but the straight-up, off the shelf string example would work just fine.
This javascript example (can be run locally on your own browser by clicking the "index.html" file or can be made live on the web by uploading it to your own server) will be a publisher and will connect to the processing example that will appear in the subscriber list. The processing sketch will then send data to the arduino via the serial cable.
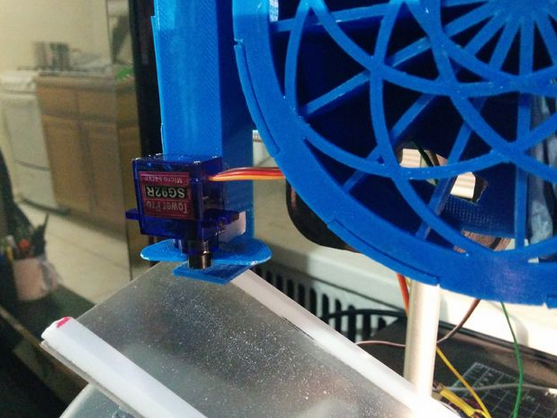
Step 2: Print and assemble the tea bag dispenser

Tea Dispenser
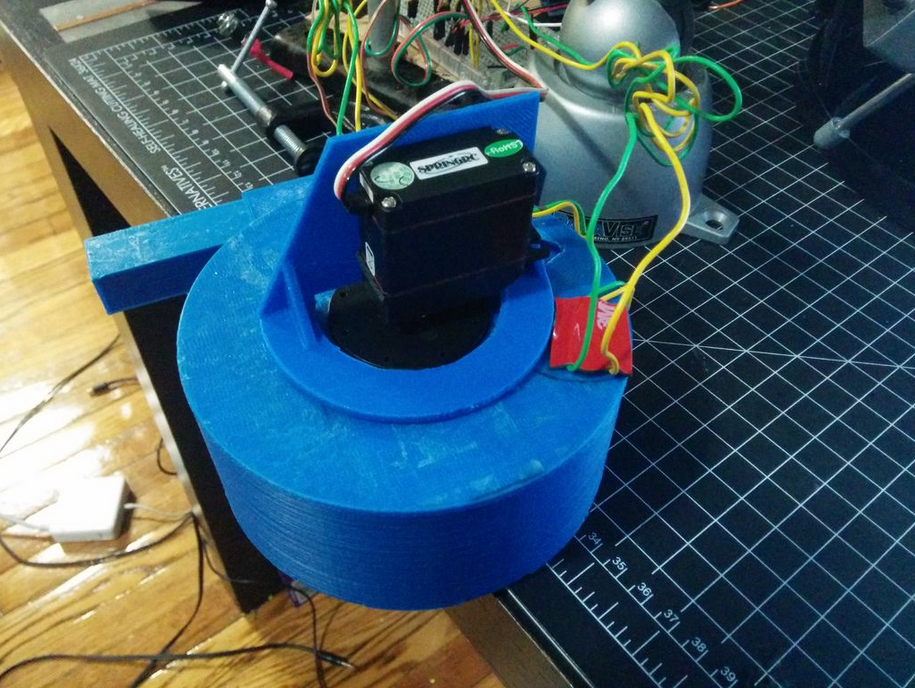
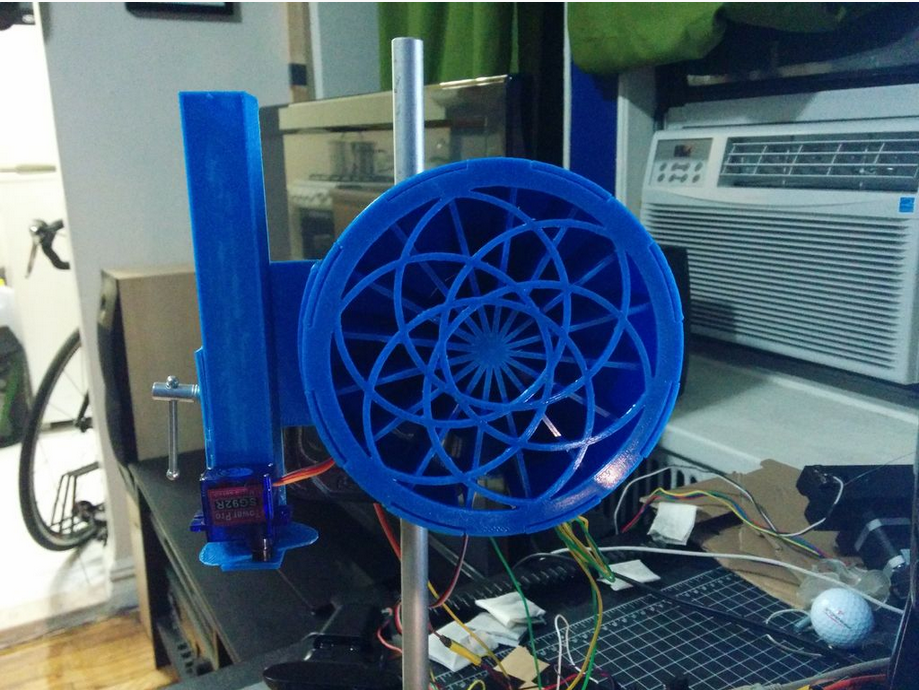
The tea bag dispenser comes in 4 pieces you must 3D print: The housing, inner carousel, face plate, and servo mount. My printer can be a little sloppy and leave small beads of plastic in certain places. If yours does the same, take an x-acto knife and a piece of sandpaper and smooth them out. This is much more important for the inside of the dispenser to prevent tea bags from getting caught and make sure they move and fall out smoothly and reliably.
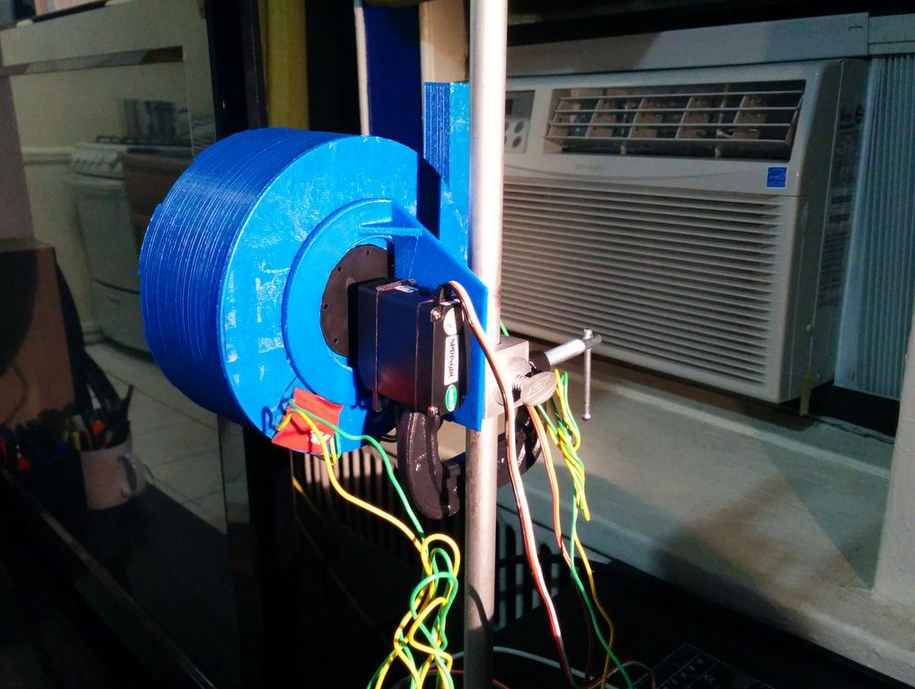
Using the mounting tape, fix one of the horns of the continuous rotation servo to the center of the cylindrical part of the inner carousel. Make sure it is as centered as possible to ensure it operates smoothly. Once this is attached, we will have to mount the servo to the back of the housing using the servo mount. Using more mounting tape, fix the servo to the servo mount and the servo mount to the back of the housing. Because we were using a metal laboratory stand to hold up the dispensers, we didnt create a separate stand to hold up both pieces. You may want to align the flat part of the servo mount to be vertical with the hole for the teabags to come out of directly beneath it. This will give you some space to attach a clamp or something like we did in the photos.
Note: Do this slowly and carefully to ensure that when everything is stuck together, the servo and carousel are aligned and give smooth motion.
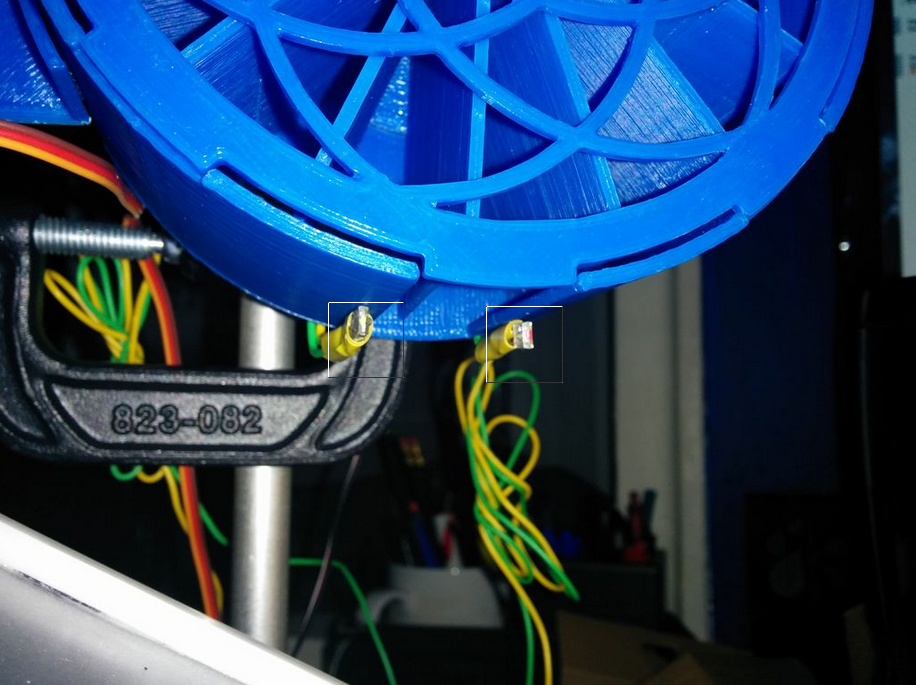
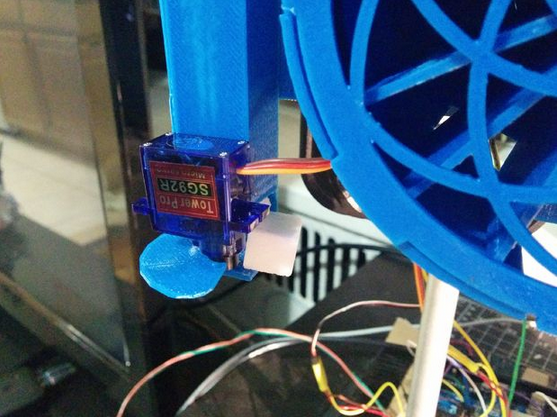
Continuous rotation servos aren't reliable enough to say "rotate for 300 ms", i.e. just long enough to line up with the next slot and release a bag. Because of this, we decided to not detect when we were over the next slot of the carousel but when we actually dropped a tea bag. For this we used an infrared LED emitter and detector to see when something was blocking the opening. Solder wires to the leads of the detector and emitter and fix them to the bottom of the tea dispenser, one on either side. These LEDs emit/detect from the side that has a little dimple on it so make sure these face each other.
We will discuss the wiring to the arduino in a later step.
Step 3: Print and assemble the sugar cube dispenser
Sugar Dispenser
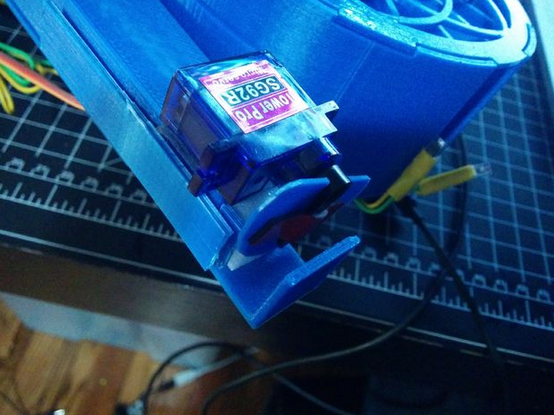
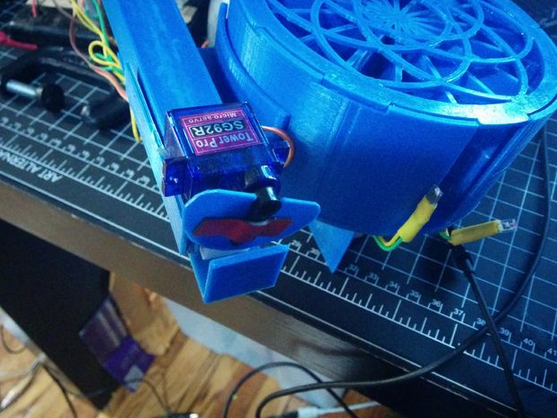
The sugar dispenser is just two pieces, the sleeve and a special horn for the micro servo. Print the sleeve without support material so the inside of the sleeve is as smooth as possible.
The servo is placed right on the outside of the sleeve and blocks the sugar cubes from falling further. When we want to release a cube, the servo pulls back, allows the next cube to fall on the small ledge then moves back to where it was. This pushes the fallen cube out to the side with the next cube resting on top of the servo horn itself. (see photos)
Just like the tea bag dispenser, make sure sugar cubes can move easily through the sleeve without getting stuck. When looking at it from the front, the left wall of the sleeve comes down a little bit further than the right. This is to prevent the sugar cube resting on the horn from following the servo as it cocks back to push out the cube. Align the servo as you see in the photos, with minimum clearance between the top of the printed servo horn and the bottom of the left wall.
You may want to run a simple arduino sketch to see if the servo can reliably push out the sugar cubes and just mounting tape before using something more rigid and permanent.
Step 4: Hacking the water heater


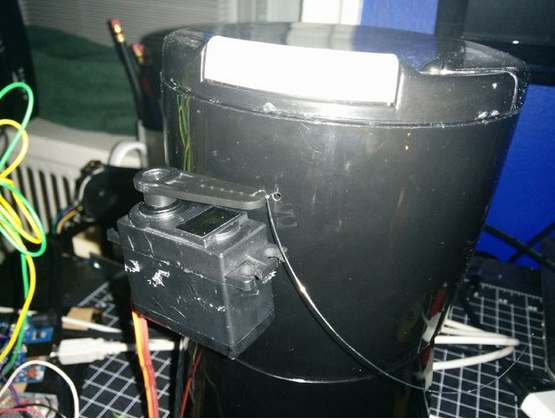
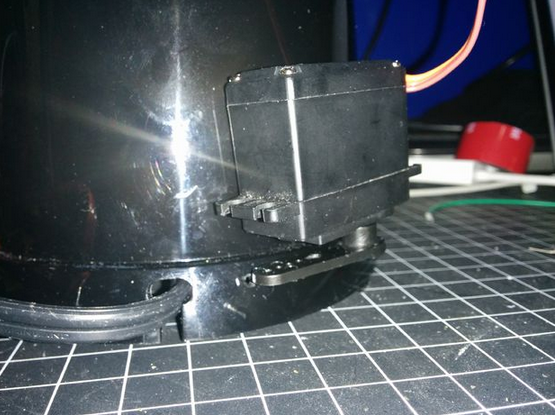
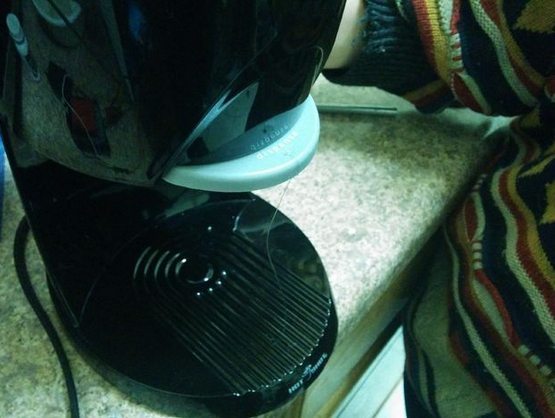
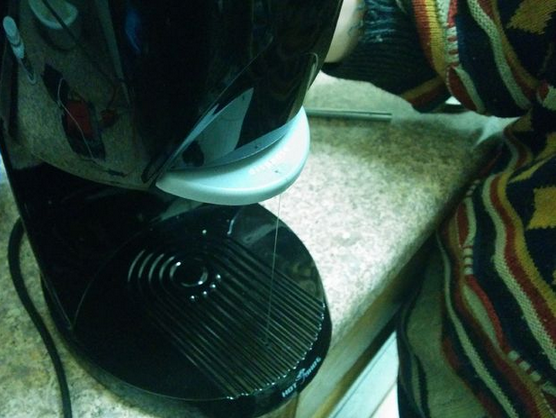
Our original idea was to get a water heater with electronics we could hack into for a more elegant solution. The water heater we had to play with was all analog components and not very hackable so we decided to just have servos push buttons for us. This was not a bad solution as it still left the buttons accessible and the heater usable without the arduino needing to be on. This required two standard servos, one for the on button (the heater automatically shut off once it was done heating) and one for the pouring mechanism.
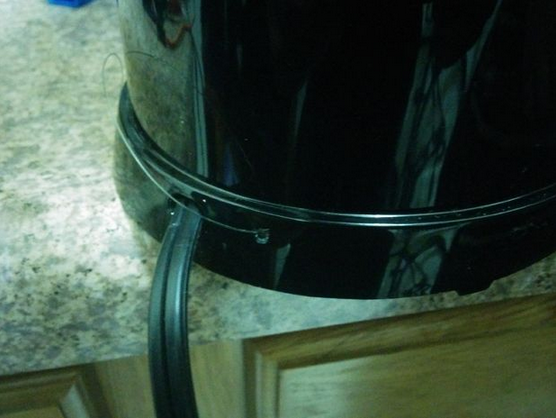
Drill small holes into the case so the fishing line can be fed through the case and attached to the necessary levers. The photos are much more clear than any description I could write so see them for more details about how it worked.
Note: Another reason we decided to use servos to push buttons rather than hack the actual electricals is because it is much safer. In addition to dealing with 120 volt mains voltages, the heater also gets EXTREMELY hot, boiling a whole cup of water in less than a minute. If you decide to replicate or improve on this project BE SAFE!
Step 5: Connect everything to the arduino

For this project we need an external 5 volt power supply because we do not want to rely on our computer's USB port to supply the current for 4 servos, even if they are never used at the same time. Just make sure that the ground on the arduino is connect to the ground on the power supply so that they can all have the same 0 volt reference voltage. However, it is a good idea to keep the 5 volts from the power supply separate from the arduino (and the usb port it is connected to), just in case there are any surges or drops in power that might affect it negatively.
Step 6: Upload and run code
The arduino and processing code are very well commented so you shouldn't have a problem figuring out what is doing what.
Once the processing sketch and javascript app is running you can see it show up in the spacebrew public server. Once you see them, just click the publisher part of the "teabot mobile" (the name given to the javascript app) and connect it to the subscriber part of the "teabot controller" (the name given to the processing sketch).
Once this connection is made the two are ready to send data to each other! Thats it, no web skills needed!
NOTE: The spacebrew "sandbox" server is a public server generously kept open to anyone that wants to experiment with spacebrew. This means that you will see other projects being worked on at the same time as you are. Practice the golden rule and only play with connections between your own apps.
Step 7: Putting it all together and running it
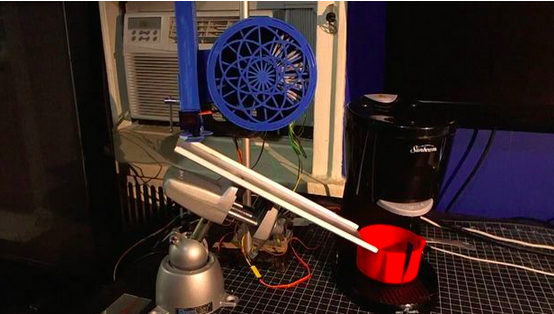
Now that all the moving pieces are together, try and run it! You will need to get creative and construct a ramp to get the tea bag and sugar cubes into the glass. You may need to create some walls on it in case the servo decides to really fling the sugar cube out of the sleeve. I simply used a piece of scrap acrylic taped to a panavise desktop vise.
The video below shows the javascript file run from a private web server so it would be accessible via mobile phone. Note that despite running on a private web server, the javascript will still publish its data to the public spacebrew server.
For more information and tutorials on how to use Spacebrew for your projects, visit www.spacebrew.cc and be sure to download their libraries for arduino, processing, javascript and openframeworks. It is a powerful platform that is ridiculously easy to use!
Enjoy your tea :)